Tutorial - How to make a ticketing system?
Step 1: Creating our Ticket
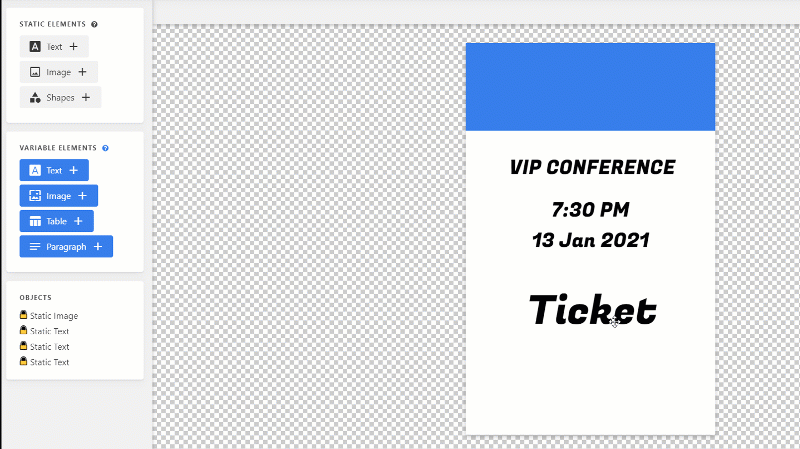
The first step will be to build our custom template in MinuteMerge.com
The most important element to add is a dynamic image: it is where our QR code will be located.
Step 2: Creating our first Integromat Scenario
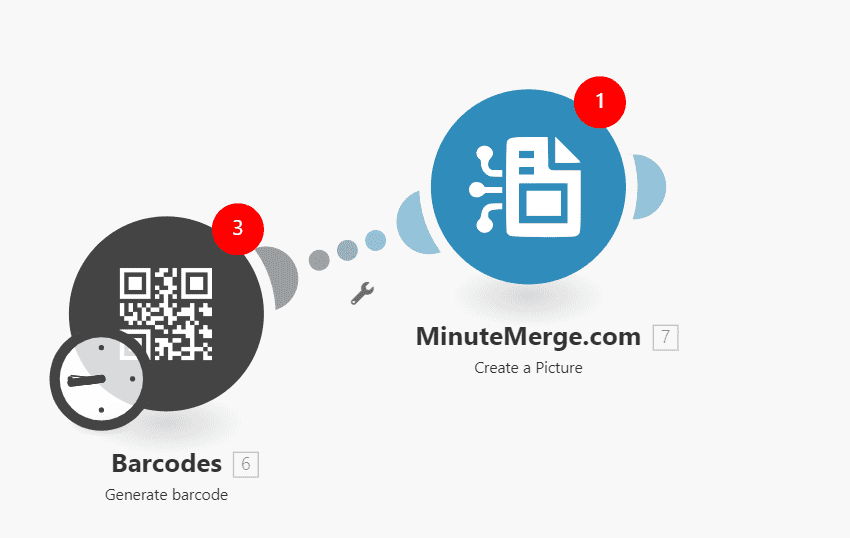
Now that our template is ready, we need to provide a QR Code dynamically to our document. The idea is that each time our ticket is generated, we will get a brand new QR code.
To do so, we will use Integromat.com
In the scenario editor, we will start with a barcode module and then, we will add the MinuteMerge module.
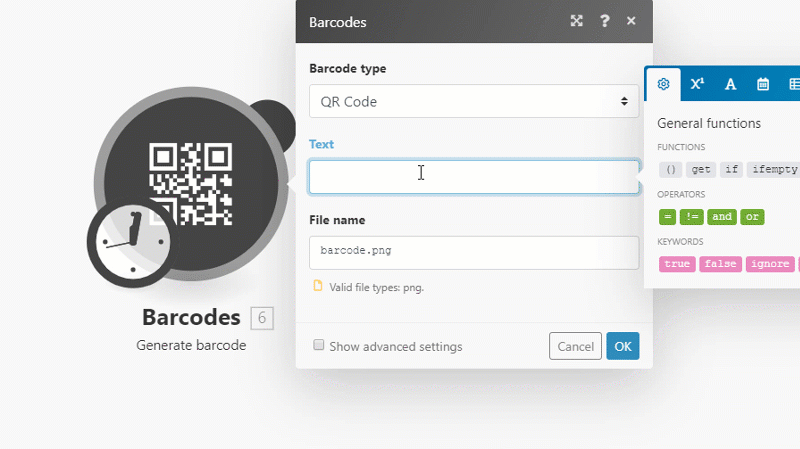
Step 3: Setting up the Barcode/QR Code module
We will choose a good quality for our QRCode. In the text field, we will use a UUID: that's a way to give each QR code a unique value.
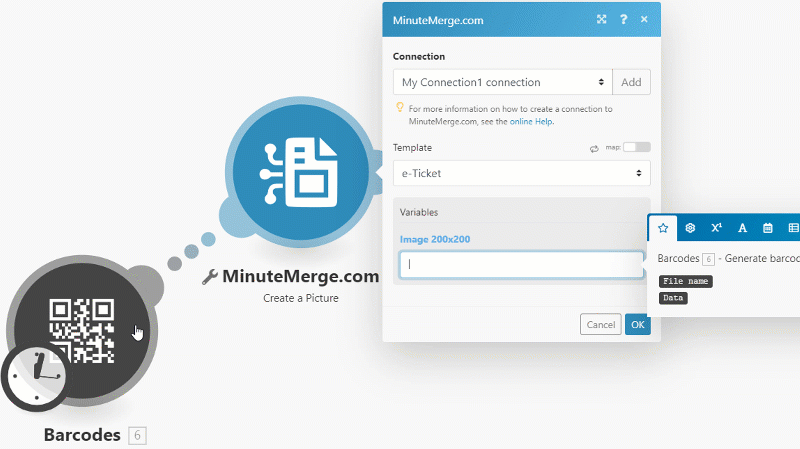
Step 4: Setting up the Minute Merge Module
In the MinuteMerge module, we just need to fill in the data from the barcode module.
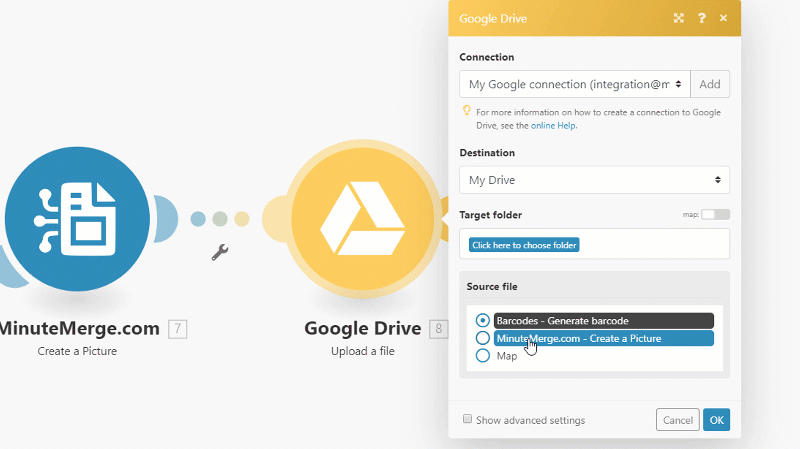
Step 5: Saving the ticket on Google Drive
Once we have setup those modules, we chose to upload our I chose to save it on Google Drive, but actually anything is possible: you could email it to your customer directly.
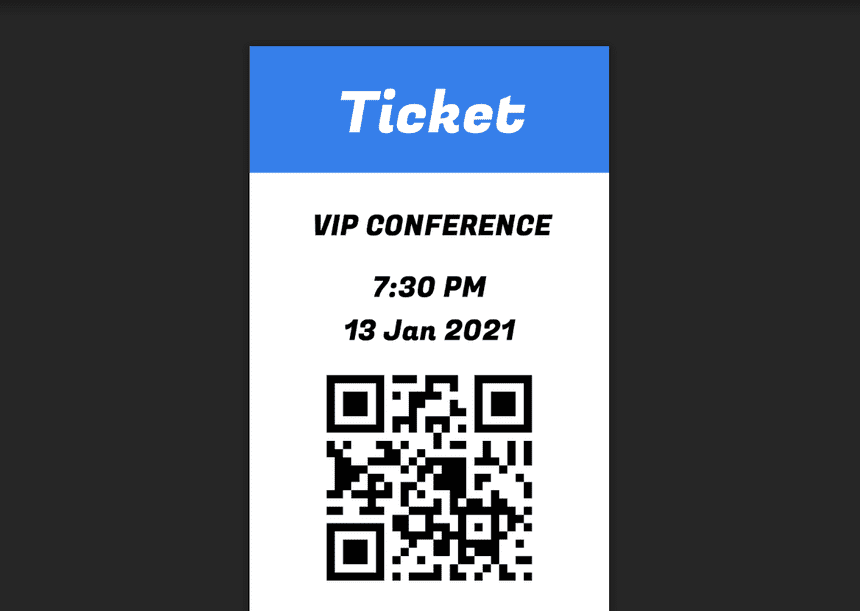
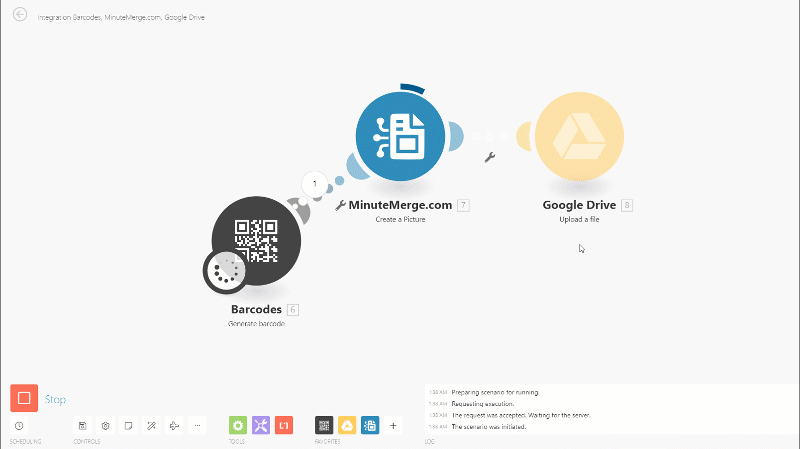
Step 6: We got our Ticket!
Once we have setup all the modules, we can test our scenario and generate a Ticket on-demand! Now you can scan it with a phone a retrieve its text.
Step 7: To be continued...
If you like this example, you will need to add a few more things to make the system production-ready:
- Consider using a UUID (unique ID) so that each QR code has a unique key
- Once you have a unique id for each QR Code, you will also need to keep track of each id, to make sure the same QR code won't be used more than once. To do so, consider using the integromat Data Store, or any other database solution.
- Webhooks: You can connect your QR code to a webhook (with the UUID as a parameter), so that each time a new QR code is scanned, this is recorded in the database.
